I know this picture frame looks a little bigger in the photo, but it is actually a 4x6 frame with a photo opening for a 3x3 photo. I started by using a 4x6 Bare Elements chipboard frame and some scrap patterned paper.
 Then I used a metal ruler, craft knife and cutting mat to get the desired size.
 I started by using a 4x6 Bare Elements chipboard frame and some scrap patterned paper.Then I used a metal ruler, craft knife and cutting mat to get the desired size.
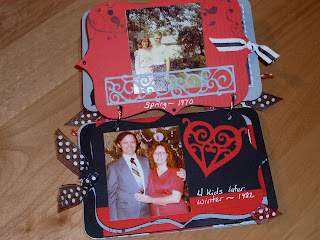
I cut the patterned paper 3 3/4 x 5 3/4, then I measured a 1/2 inch in on 3 sides and 2 1/2 inches in on the long side. That gave me an opening of 2 3/4 x 2 3/4. After I attached the paper to my base I ran some white ribbon under the edge of the photo. Then I selected the color flowers to go with my theme and attached them. I selected plain chipboard letters that I inked, ran through a Cuttlebug Embossing Folder, then used Glossy Accents on top of them.
 All together it only took about 20 minutes and I now have a cute handmade picture frame.
I selected plain chipboard letters that I inked, ran through a Cuttlebug Embossing Folder, then used Glossy Accents on top of them. All together it only took about 20 minutes and I now have a cute handmade picture frame.