 Save 50% on the Seaweed stamp this month. It is the June stamp of the month. Only $4.99.
Friday, May 29, 2009
June 2009 Great Impressions Stamps Extra cards
 Save 50% on the Seaweed stamp this month. It is the June stamp of the month. Only $4.99.
Graduation Card
Tuesday, May 26, 2009
Chatterbox Botanico 12x12 layout


 Then she made this layout to coordinate with it across the page in her scrapbook.
Flower Soft
 We've heard your requests, and are so excited to finally carry FlowerSoft.
Monday, May 18, 2009
2 page layout with Melissa Frances papers
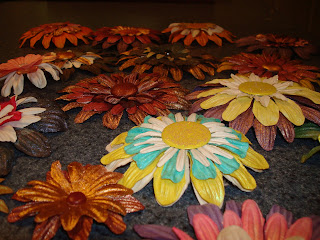
 It started with this shimmery flower that LaDonna made the other day. (We have these available in the store for just $1.79). I knew I wanted to use it on a layout, so I started looking for coordinating paper, then appropriate photos. It doesn't always start with the photos for me.
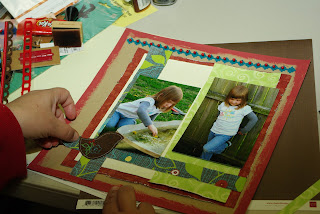
 I knew I was going for a distressed look on these pages,
  I peeled the backing off the felt fusion strip and used two pieces in the corner, slightly overlapping the photo.
I ran some burgandy Distressed Stickles along the torn edge of the matting background.

Then added this My Mind'e Eye rub-on to the Tim Holtz journaling ticket that was just the right size.
 I like the large chipboard letters and decided to cover them with coordinating paper.
 I sprayed the back of the paper for strong, even coverage.
 Adhered the paper to the back of the chipboard letters
  Sometimes I ink around the edges of covered chipboard, but with the small center openings, I decided to use a tombow marker. I strongly recommend holding the marker behind the letter and running the tip around the edges from the back side. That way when the pen slips, (and it occasionally will) you will only leave a mark on the back of the letter.
 The rest of the letters were cut with the Cricut from coordinating paper.
Posted by The Scrapbook Tree at 9:49 PM 0 comments
Labels: 2 page layout, chipboard letters, distressed stickles, distressinig, glaze pens, Melissa Frances, rub-ons
More Beautiful Flowers
 I even customized some glitter brads to complete the look.
Posted by The Scrapbook Tree at 5:30 PM 0 comments
Labels: custom flowers, glitter brads, Lumin Arte mists, shimmer mist
Wednesday, May 13, 2009
Tips for decorating your mini purse albums
Everyone who attended our NSD Crop May 2nd received a Bare Elements Mini Purse Album in their goody bag. I know I posted a picture of how I decorated the outside, but several people asked to see the inside also. So I thought I would post pictures of each page and pass along a few tips to remember when decorating your own.
I started by using shimmer mist and spayed each page. I used a Paper towel to spread an even coat across the whole page, including the handle. You can also use a foam make-up sponge.
 On the inside I started with two of the patterned papers. Remember to leave a border all the way around the edge. If you place your paper all the way in the crease, by the time you are finished with every page your album will barely close. You will also want to remember to place your photos towards the handles to avoid to much thickness in the folds.
On the next page I used two of the Bazzill cardstock circles. To avoid thickness in the album I used mostly pens and stamping for my embellishments. Rub-ons would work great also.
 On the next page I used another Bazzill cardstock color. Notice I used some Magic Mesh behind a few of the photos, but always placed it toward the outside edge of the album.
 Then for these pages I went back to the darker Bazzill cardstock.
 I ended the album with patterned paper. It's hard to tell in this photo, but I used a glitter pen to accent the design in the paper.
 I know I told you to select 3 Bazzill colors and you only see two colors on my album. I used two sheets of the same color. Later I thought it would have looked better with a different background color on the front and back covers.
If you didn't attend the crop but would still like to buy one of these mini albums, we still have a few left.
Posted by The Scrapbook Tree at 10:40 AM 0 comments
Labels: Airy Fairy paper line, Bare Elements mini album, Purse Mini album, shimmer mist
Saturday, May 9, 2009
Thinking of you card
Thursday, May 7, 2009
Pink Paislee Pop Fashion page layout
 I cut the small frames out of the transparency because the photos I was working with did not fit.
I adherred it to the paper at an angle then flipped it over and trimmed off the excess.

I love those silvery metallic rub-ons, so I started adding them. They are not kidding when they call these press-ons. Light rubbing is all that is needed and they tranfer easily.

In this close-up you can see how silvery the clear overlay is that I trimmed down. It was a full 12x12 sheet. I'll probably use the rest on the page that will go across from this one in my album.

I took a bright pink felt flower and added stickles for dimension.
 I punched out a scalloped circle from the remains of pink pink cardstock and ran it through the Sizzix big Shot in the Cuttlebug embossing folder, then inked it to layer under the felt flower.
Posted by The Scrapbook Tree at 5:08 PM 0 comments
Labels: 12x12 page layout, clear overlay, Pink Paislee, Pop Fashion, scrapbook techniques
Tuesday, May 5, 2009
12x12 page layout

I love this diecut paper from Making Memories. This was not what I had originally planned to do with this paper, but you know how that goes sometimes once you start on a project. I pulled out scraps from the pink and green files to put behind the openings, added the Prima flowers and used a slickwriter to journal on the clear overlay.
Posted by The Scrapbook Tree at 8:57 PM 0 comments
Labels: 12x12 page layout, Making Memories Mocha diecut paper, Prima clear paintables


